【旧物利用】使用 Cisco IP Phone 7945G 打造家庭 SIP 电话专网(基于 FreePBX)
|
几个月前,在某二手鱼平台上看到了 Cisco 的 IP 电话很便宜,30 块钱左右一台,就头脑一热买了 4 台。到货之后,才发现这玩意默认不是标准 SIP 协议的,Google 一下之后,发现官方推荐玩法是架一套 Unified CM,尝试了多次架设 UCM 未果,就丢墙角躺尸去了。
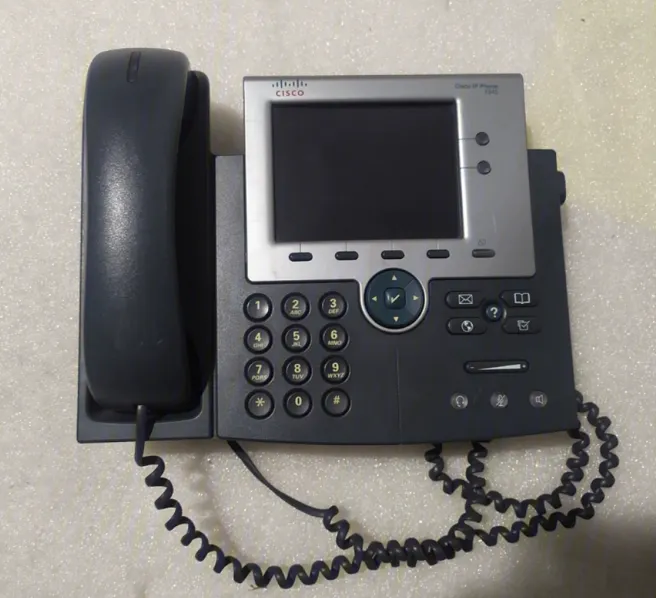
直到最近在看**津津乐道播客**朱老板直播装机的时候,发现朱老板直播间桌子上也有一个类似的机器,便向朱老板请教,朱老板的 IP 话机型号是 7942,应该和 7945G 同属于 79XX 系,让我看到了成功的曙光。
通过本文,你将了解到如何利用 Cisco 7945G,SIPSoftPhone,FreePBX 组建一个家庭 SIP 电话专网。
准备!
你除了需要有几台 Cisco 7945G 电话外,还需要准备以下软件,推荐官网下载,见下方链接。
软电话:MicroSIP、LinPhone SIP 服务器软件:FreePBX TFTP 和 DHCP 服务器:TFTPD
网络规划
在进行 SIP 组网之前,首先需要对家庭现网进行调研并对即将扩展的 SIP 专网进行必要的规划。 以下网络规划可以供你参考。
电话专网 VLAN 76 网段:192.168.76.0/24 网关:192.168.76.254 要注意的是,不要开启路由器的 DHCP 服务器,该局域网的 DHCP 服务,将由 TFTPD 提供。
服务器搭建
这部分主要搭建两台服务器,一个是 TFTP 服务器,一个是 FreePBX 服务器。Cisco IP 电话会通过 TFTP 获取固件、配置文件等信息。FreePBX 提供了 SIP 服务,是一款开源的软交换平台。
TFTP 服务器的搭建及配置
你可以有多种方式搭建 TFTP 服务器,这里我的方案是采用 WindowsServer2008R2 配合 TFTPD64 使用。
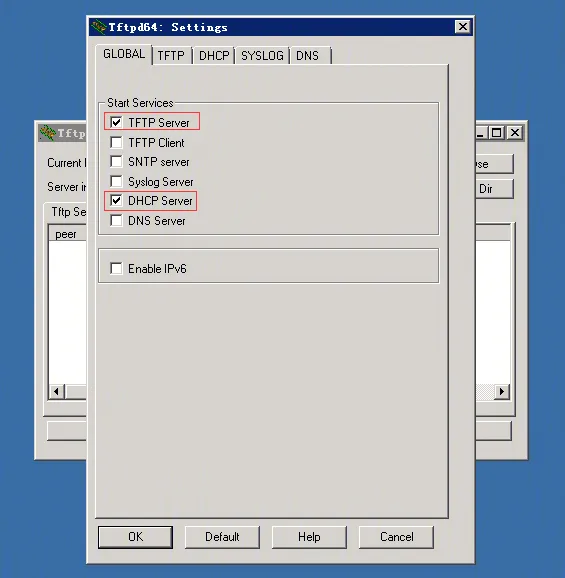
将该服务器的 IP 地址配置为 192.168.76.100(该地址请按照实际规划来配置),安装 TFTPD64 软件,并如图配置。
使能 TFTP 服务和 DHCP 服务。
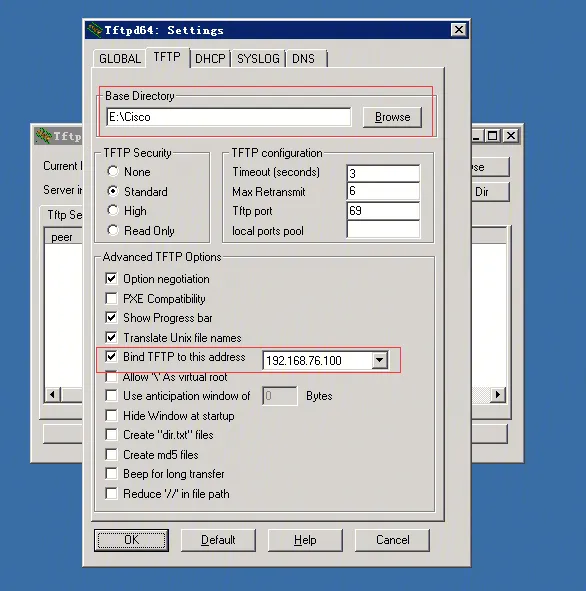
 选择 TFTP 服务器工作目录,并绑定到服务器的 IP 地址上。这里 E 盘的 Cisco 目录是放置话机固件以及相关配置文件用的,你可以根据实际情况定义。
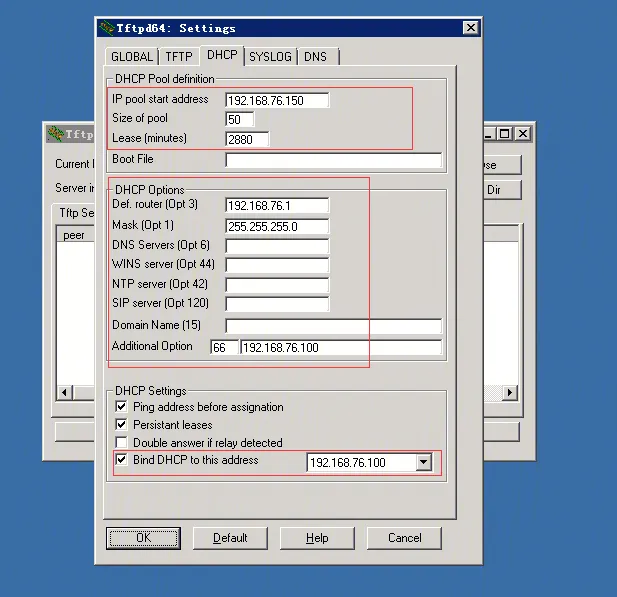
 配置 DHCP 服务,建立 DHCP 池、填写默认网关、掩码,并添加一个特殊的 DHCP Option,值为 66,指向 TFTP 服务器地址。最后将服务绑定到服务器的 IP 地址上。同样的,这些配置建议你按照自己的实际规划情况进行配置。
FreePBX 服务器的搭建及配置
下载,安装 FreePBX。整个过程类似于安装 CentOS。这里就不过多写啦。整个过程都是自动化的,只需要你配置好时区、NTP 地址、服务器 IP、主机名以及 ROOT 密码即可。
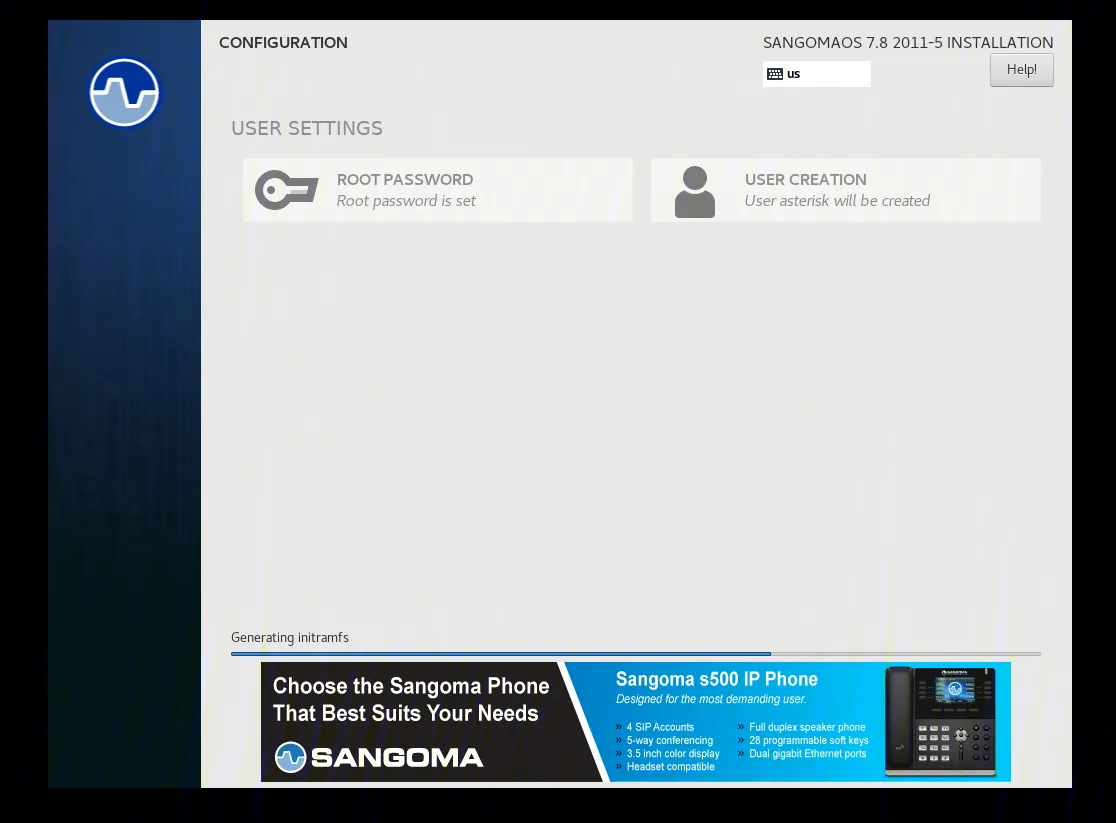 安装完毕后,重启进入系统,如图所示,系统就安装成功啦~。
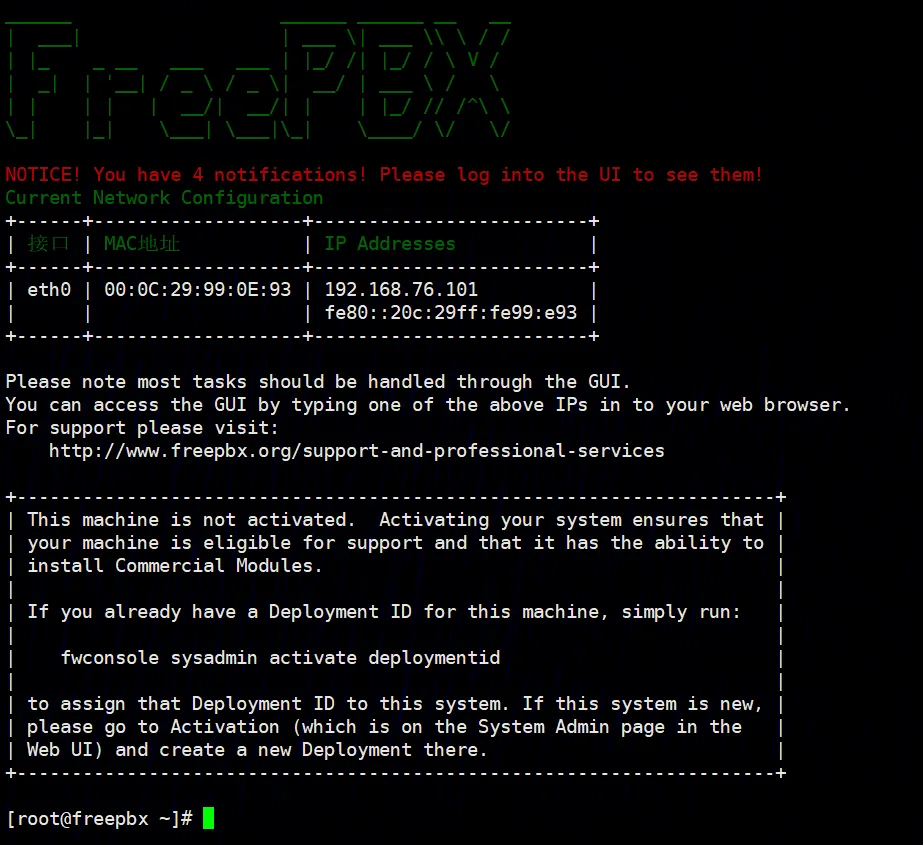 使用浏览器登录服务器 IP,可以进入 FreePBX 的配置界面。
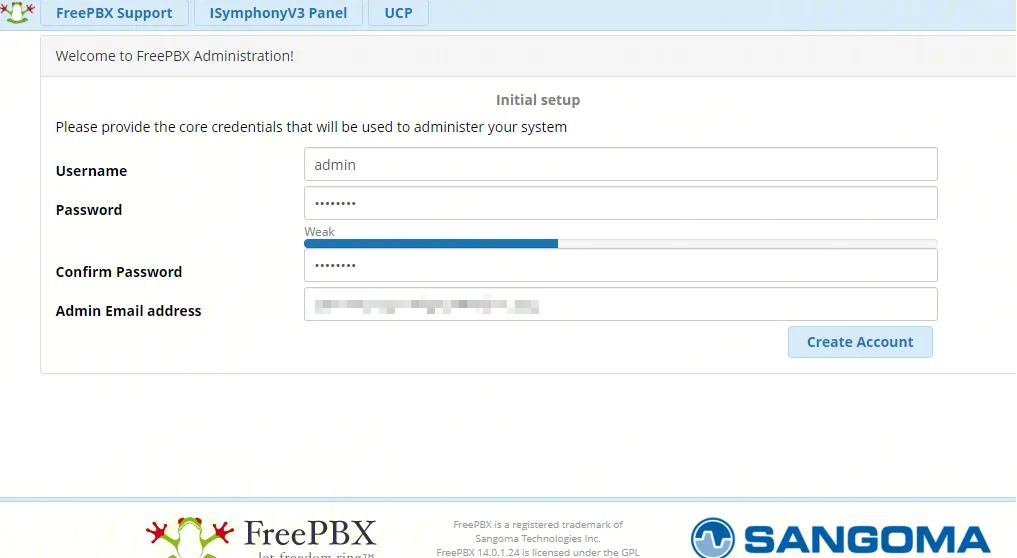
首先要配置管理员用户和密码。
使用浏览器登录服务器 IP,可以进入 FreePBX 的配置界面。
首先要配置管理员用户和密码。
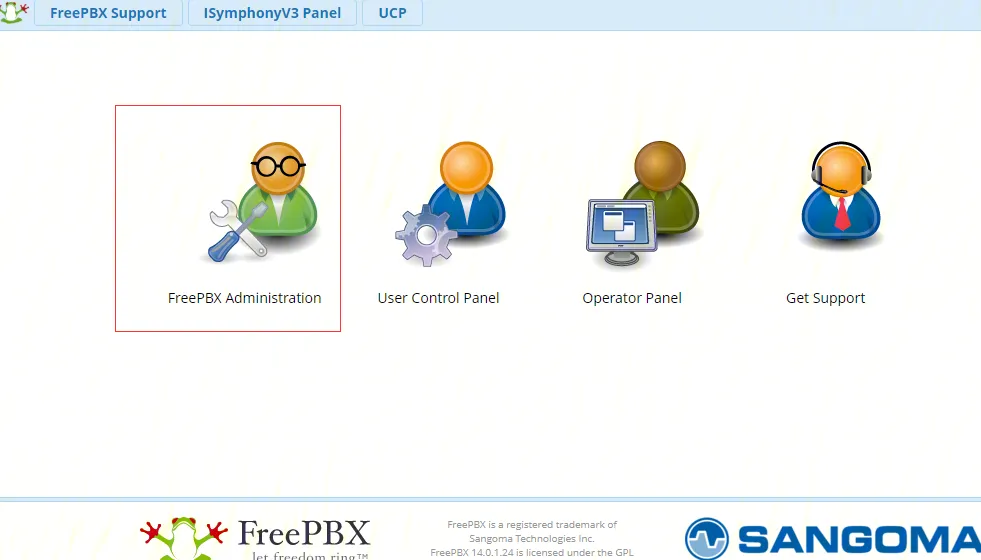
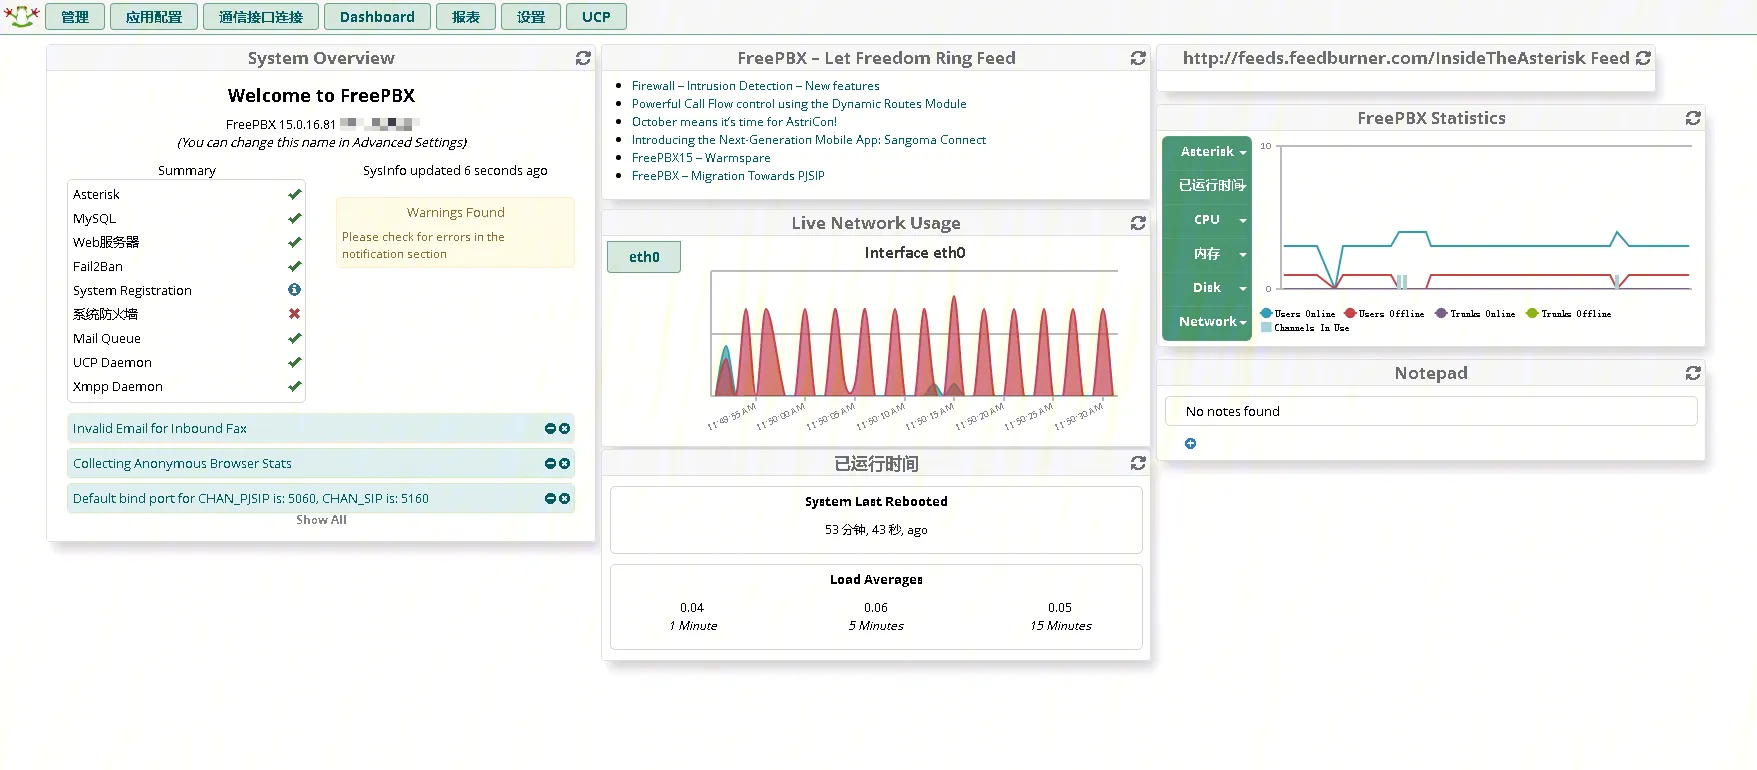
 配置完成后,登录管理员控制台。
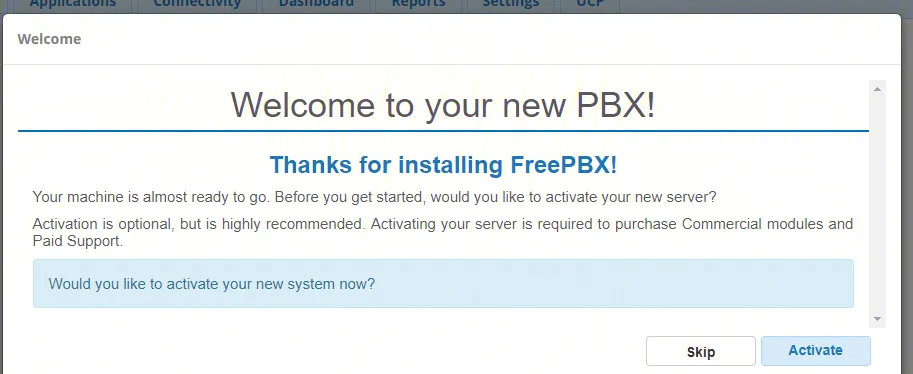
 是否激活?激活可以使用更多的商用模块,但是咱们用不到,这里就不激活了,直接 Skip。
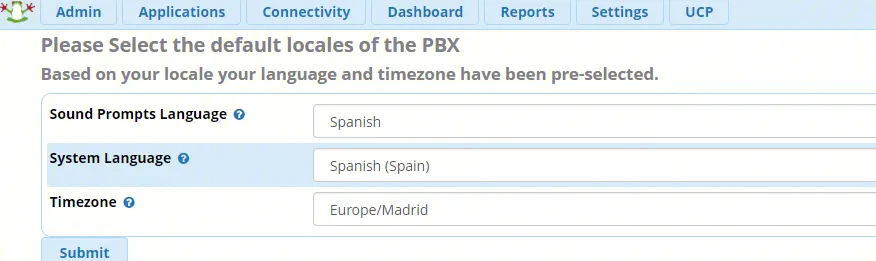
 下一步选择时区和地区,直接选 English,China 即可。
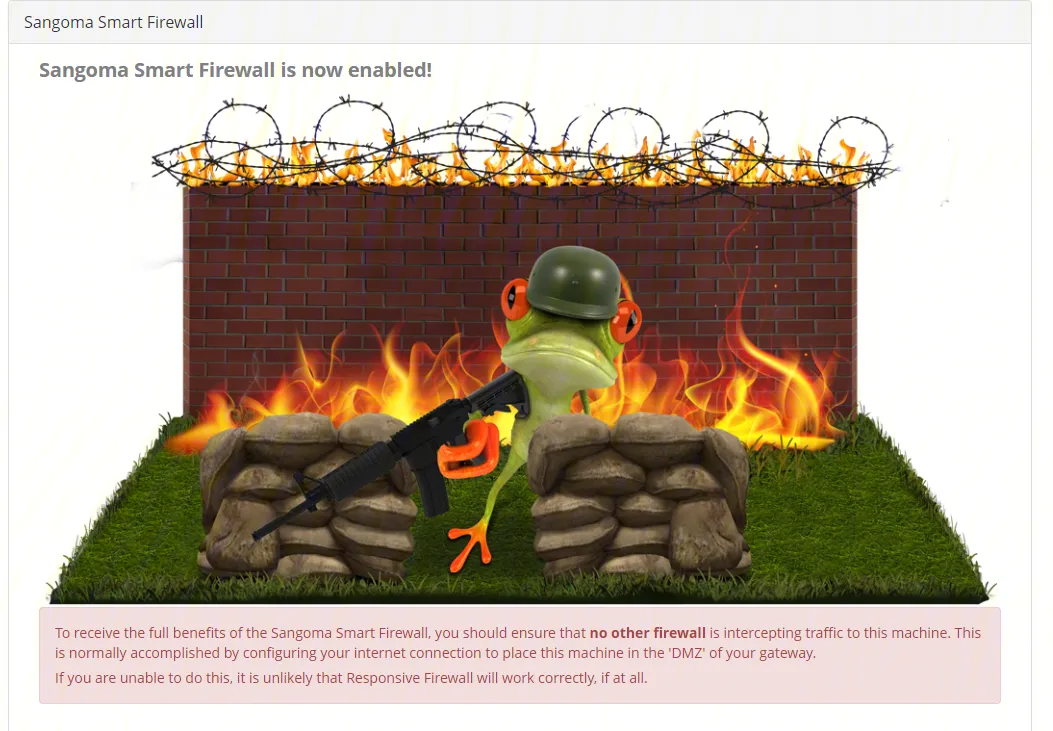
 配置防火墙?实际用不到,这里我就不配置了,直接 Abort。
 到这里,你的 FreePBX 服务器已经基本 OK 啦。
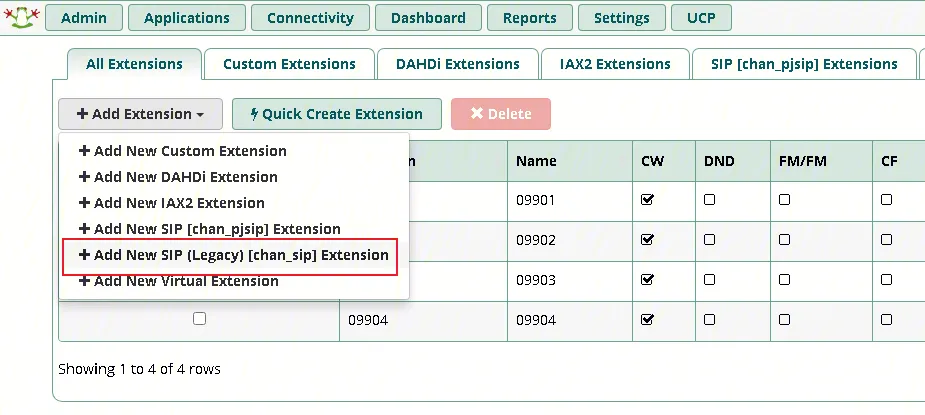
建立分机
一切就绪,我们就可以建立分机啦。建立分机的过程,相当于我们向电信局申请电话号码。
登录 FreePBX 控制台,选择Application->Extension,并选择Add New SIP (Legacy) [chan_sip] Extension。
 填写
填写User Extension、 Display Name、Secret。
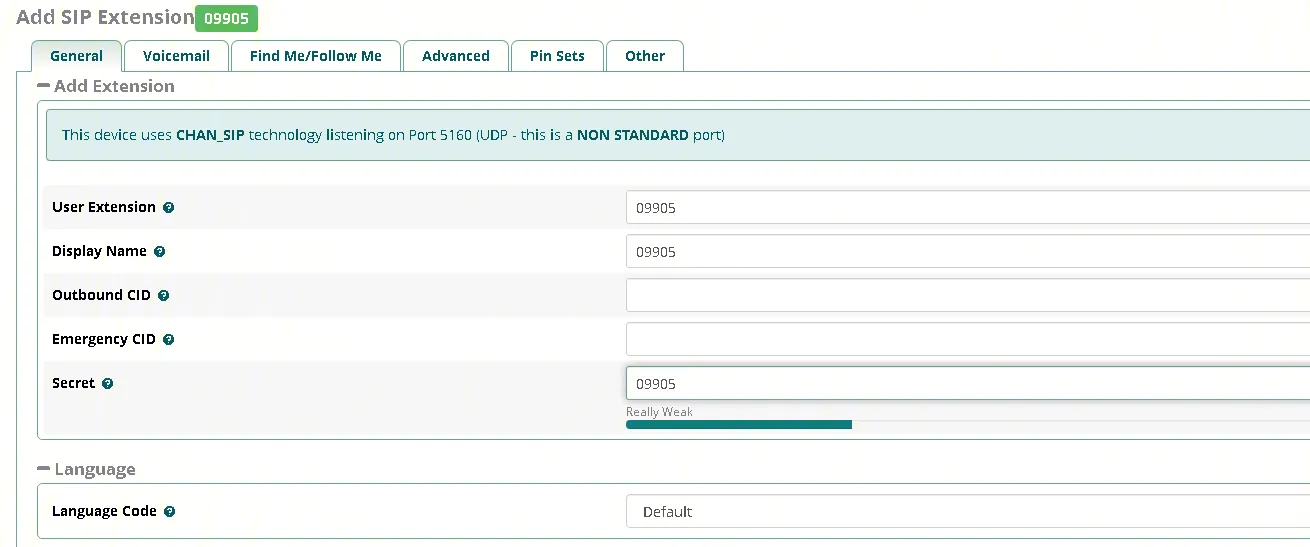 要注意的是,早期 Cisco 话机不能识别特别复杂的密码,建议这里配一个弱口令吧。
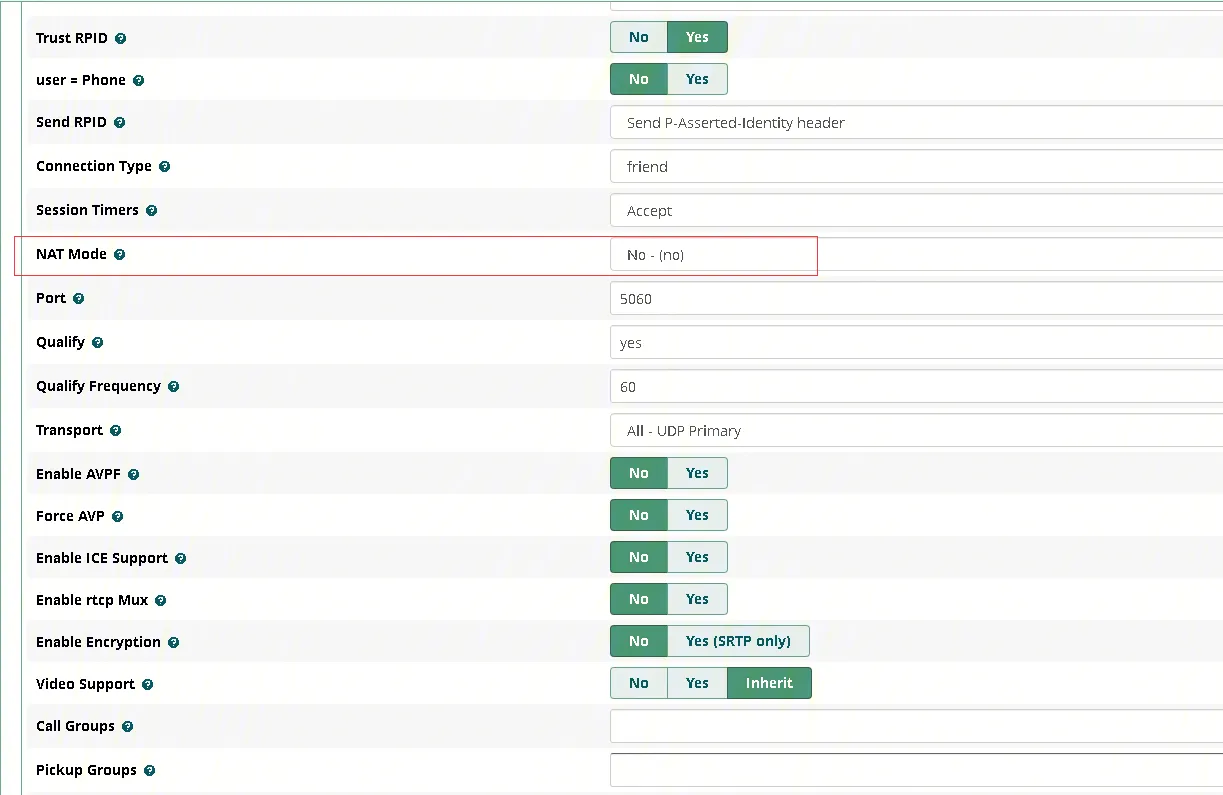
切换到
要注意的是,早期 Cisco 话机不能识别特别复杂的密码,建议这里配一个弱口令吧。
切换到Advanced选项卡,找到NAT Mode,将其改为No,点击 Submit 提交。
 这样,一个分机就建立完成了。同样的,你还可以建立 Chan_pjsip 类型的分机。只要注意其端口号的细微变化即可。
Cisco 7945G 配置文件
在这部分,我们需要准备以下文件。SIP 固件包,全局配置文件,话机配置文件。
固件包
经测试,sip.8-5-4固件的兼容性是最好的,下载地址:cmterm-7945_7965-sip.8-5-4.rar
XMLDefault.cnf.xml
全局配置文件,这个文件针对 Cisco IP 话机定义了诸如 SIP 服务器地址、设备型号以及固件等信息。
<?xml version="1.0" ?>
<Default>
    <callManagerGroup>
        <members>
            <member priority="0">
                <callManager>
                    <ports>
                        <ethernetPhonePort>2000</ethernetPhonePort>
                        <mgcpPorts>
                            <listen>2427</listen>
                            <keepAlive>2428</keepAlive>
                        </mgcpPorts>
                    </ports>
                    <!--FREEPBX SERVER IP GOES HERE-->
                    <processNodeName>_FREEPBX_</processNodeName>
                </callManager>
            </member>
        </members>
    </callManagerGroup>
    <!--Cisco IP Phone Firmware-->
    <loadInformation435 model="Cisco 7945">SIP45.8-5-4S</loadInformation435>
    <authenticationURL></authenticationURL>
    <directoryURL></directoryURL>
    <idleURL></idleURL>
    <informationURL></informationURL>
    <messagesURL></messagesURL>
    <servicesURL></servicesURL>
</Default>注意我加注释的两个位置,_FREEPBX_这里要替换成你的 FreePBX 服务器 IP 地址,我这里是 192.168.76.101。
<!--Cisco IP Phone Firmware-->这里定义了该型号话机的固件文件信息,我已经配置好了,可以不用动了。
SEPMACADDRESS.cnf.xml
这个文件是每个话机的个性化配置文件,文件格式为SEP话机的MAC地址.cnf.xml,例如话机的 SW 口 MAC 地址为1CE6C7729A47,则其对应的配置文件名就应该是SEP1CE6C7729A47.cnf.xml。
<?xml version="1.0" ?>
<device>
  <deviceProtocol>SIP</deviceProtocol>
  <sshUserId>cisco</sshUserId>
  <sshPassword>cisco</sshPassword>
  <devicePool>
    <dateTimeSetting>
      <dateTemplate>D.M.Y</dateTemplate>
      <timeZone>China Standard/Daylight Time</timeZone>
      <ntps>
        <ntp>
          <name>_NTP_</name>
          <ntpMode>Unicast</ntpMode>
        </ntp>
      </ntps>
    </dateTimeSetting>
    <callManagerGroup>
      <members>
        <member priority="0">
          <callManager>
            <ports>
              <ethernetPhonePort>2000</ethernetPhonePort>
              <sipPort>5160</sipPort>
              <securedSipPort>5061</securedSipPort>
            </ports>
            <processNodeName>_FREEPBX_</processNodeName>
          </callManager>
        </member>
      </members>
    </callManagerGroup>
  </devicePool>
  <sipProfile>
    <sipProxies>
      <backupProxy></backupProxy>
      <backupProxyPort></backupProxyPort>
      <emergencyProxy></emergencyProxy>
      <emergencyProxyPort></emergencyProxyPort>
      <outboundProxy></outboundProxy>
      <outboundProxyPort></outboundProxyPort>
      <registerWithProxy>true</registerWithProxy>
    </sipProxies>
    <sipCallFeatures>
      <cnfJoinEnabled>true</cnfJoinEnabled>
      <callForwardURI>x-cisco-serviceuri-cfwdall</callForwardURI>
      <callPickupURI>x-cisco-serviceuri-pickup</callPickupURI>
      <callPickupListURI>x-cisco-serviceuri-opickup</callPickupListURI>
      <callPickupGroupURI>x-cisco-serviceuri-gpickup</callPickupGroupURI>
      <meetMeServiceURI>x-cisco-serviceuri-meetme</meetMeServiceURI>
      <abbreviatedDialURI>x-cisco-serviceuri-abbrdial</abbreviatedDialURI>
      <rfc2543Hold>false</rfc2543Hold>
      <callHoldRingback>2</callHoldRingback>
      <localCfwdEnable>true</localCfwdEnable>
      <semiAttendedTransfer>true</semiAttendedTransfer>
      <anonymousCallBlock>2</anonymousCallBlock>
      <callerIdBlocking>2</callerIdBlocking>
      <dndControl>0</dndControl>
      <remoteCcEnable>true</remoteCcEnable>
    </sipCallFeatures>
    <sipStack>
      <sipInviteRetx>6</sipInviteRetx>
      <sipRetx>10</sipRetx>
      <timerInviteExpires>180</timerInviteExpires>
      <timerRegisterExpires>3600</timerRegisterExpires>
      <timerRegisterDelta>5</timerRegisterDelta>
      <timerKeepAliveExpires>120</timerKeepAliveExpires>
      <timerSubscribeExpires>120</timerSubscribeExpires>
      <timerSubscribeDelta>5</timerSubscribeDelta>
      <timerT1>500</timerT1>
      <timerT2>4000</timerT2>
      <maxRedirects>70</maxRedirects>
      <remotePartyID>true</remotePartyID>
      <userInfo>None</userInfo>
    </sipStack>
    <autoAnswerTimer>1</autoAnswerTimer>
    <autoAnswerAltBehavior>false</autoAnswerAltBehavior>
    <autoAnswerOverride>true</autoAnswerOverride>
    <transferOnhookEnabled>false</transferOnhookEnabled>
    <enableVad>false</enableVad>
    <preferredCodec>g711alaw</preferredCodec>
    <dtmfAvtPayload>101</dtmfAvtPayload>
    <dtmfDbLevel>3</dtmfDbLevel>
    <dtmfOutofBand>avt</dtmfOutofBand>
    <alwaysUsePrimeLine>false</alwaysUsePrimeLine>
    <alwaysUsePrimeLineVoiceMail>false</alwaysUsePrimeLineVoiceMail>
    <kpml>3</kpml>
    <natEnabled>false</natEnabled>
    <natAddress></natAddress>
    <phoneLabel>_PHONELABEL_</phoneLabel>
    <stutterMsgWaiting>0</stutterMsgWaiting>
    <callStats>false</callStats>
    <silentPeriodBetweenCallWaitingBursts>10</silentPeriodBetweenCallWaitingBursts>
    <disableLocalSpeedDialConfig>false</disableLocalSpeedDialConfig>
    <startMediaPort>16384</startMediaPort>
    <stopMediaPort>32766</stopMediaPort>
    <sipLines>
      <line button="1">
        <featureID>9</featureID>
        <featureLabel>_USERID_</featureLabel>
        <proxy>USECALLMANAGER</proxy>
        <port>5160</port>
        <name>_USERID_</name>
        <displayName>_USERID_</displayName>
        <autoAnswer>
          <autoAnswerEnabled>2</autoAnswerEnabled>
        </autoAnswer>
        <callWaiting>3</callWaiting>
        <authName>_USERID_</authName>
        <authPassword>_USERPASSWORD_</authPassword>
        <sharedLine>false</sharedLine>
        <messageWaitingLampPolicy>1</messageWaitingLampPolicy>
        <messagesNumber>*97</messagesNumber>
        <ringSettingIdle>4</ringSettingIdle>
        <ringSettingActive>5</ringSettingActive>
        <contact>_USERID_</contact>
        <forwardCallInfoDisplay>
          <callerName>true</callerName>
          <callerNumber>true</callerNumber>
          <redirectedNumber>true</redirectedNumber>
          <dialedNumber>true</dialedNumber>
        </forwardCallInfoDisplay>
      </line>
    </sipLines>
    <voipControlPort>5160</voipControlPort>
    <dscpForAudio>184</dscpForAudio>
    <ringSettingBusyStationPolicy>0</ringSettingBusyStationPolicy>
    <dialTemplate>dialplan.xml</dialTemplate>
  </sipProfile>
  <commonProfile>
    <phonePassword>9874123</phonePassword>
    <backgroundImageAccess>true</backgroundImageAccess>
    <callLogBlfEnabled>2</callLogBlfEnabled>
  </commonProfile>
  <loadInformation>SIP45.8-5-4S</loadInformation>
  <vendorConfig>
    <disableSpeaker>false</disableSpeaker>
    <disableSpeakerAndHeadset>false</disableSpeakerAndHeadset>
    <pcPort>1</pcPort>
    <settingsAccess>1</settingsAccess>
    <garp>0</garp>
    <voiceVlanAccess>0</voiceVlanAccess>
    <videoCapability>0</videoCapability>
    <autoSelectLineEnable>0</autoSelectLineEnable>
    <sshAccess>0</sshAccess>
    <sshPort>22</sshPort>
    <webAccess>0</webAccess>
    <spanToPCPort>1</spanToPCPort>
    <loggingDisplay>1</loggingDisplay>
    <loadServer></loadServer>
  </vendorConfig>
  <versionStamp></versionStamp>
  <userLocale>
    <name>English_United_States</name>
    <langCode>en</langCode>
  </userLocale>
  <networkLocale>United_States</networkLocale>
  <networkLocaleInfo>
    <name>United_States</name>
  </networkLocaleInfo>
  <deviceSecurityMode>1</deviceSecurityMode>
  <authenticationURL></authenticationURL>
  <directoryURL></directoryURL>
  <idleURL></idleURL>
  <informationURL></informationURL>
  <messagesURL></messagesURL>
  <proxyServerURL></proxyServerURL>
  <servicesURL></servicesURL>
  <dscpForSCCPPhoneConfig>96</dscpForSCCPPhoneConfig>
  <dscpForSCCPPhoneServices>0</dscpForSCCPPhoneServices>
  <dscpForCm2Dvce>96</dscpForCm2Dvce>
  <transportLayerProtocol>2</transportLayerProtocol>
  <capfAuthMode>0</capfAuthMode>
  <capfList>
    <capf>
      <phonePort>3804</phonePort>
    </capf>
  </capfList>
  <certHash></certHash>
  <encrConfig>false</encrConfig>
</device>这些_ _的参数是关键的。其对应关系如下。
_NTP_ NTP 服务器地址,用于对时。
_FREEPBX_ FreePBX 服务器地址。
_USERID_ 用户 ID,就是你的电话号码。
_USERPASSWORD_ 用户鉴权密码,就是 FreePBX 中的 Secret。
_PHONELABEL_ 电话标签,显示在电话的右上角,可自定义。
如果你想了解更多关于 Cisco IP 话机的配置情况,可以参考文章结尾的参考文献。
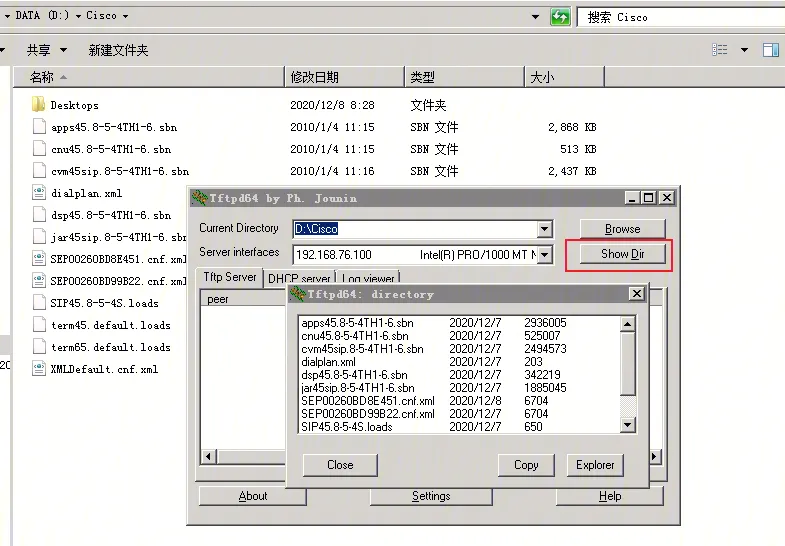
上传 TFTP
将以上文件,上传到 TFTP 的工作目录下(例如 E:\Cisco),如图。使用 Show DIR 可以看到目录中的文件。
刷机、更新、注册
下一步,我们就要对话机进行刷机和更新了。
将话机接入网络(需和 TFTP 服务器、DHCP 服务器、FreePBX 在同一网段,即文章开头规划的 SIP 专网),插入 SW 接口。按住#号键,上电,等橘色等交替闪烁,松开#号键。
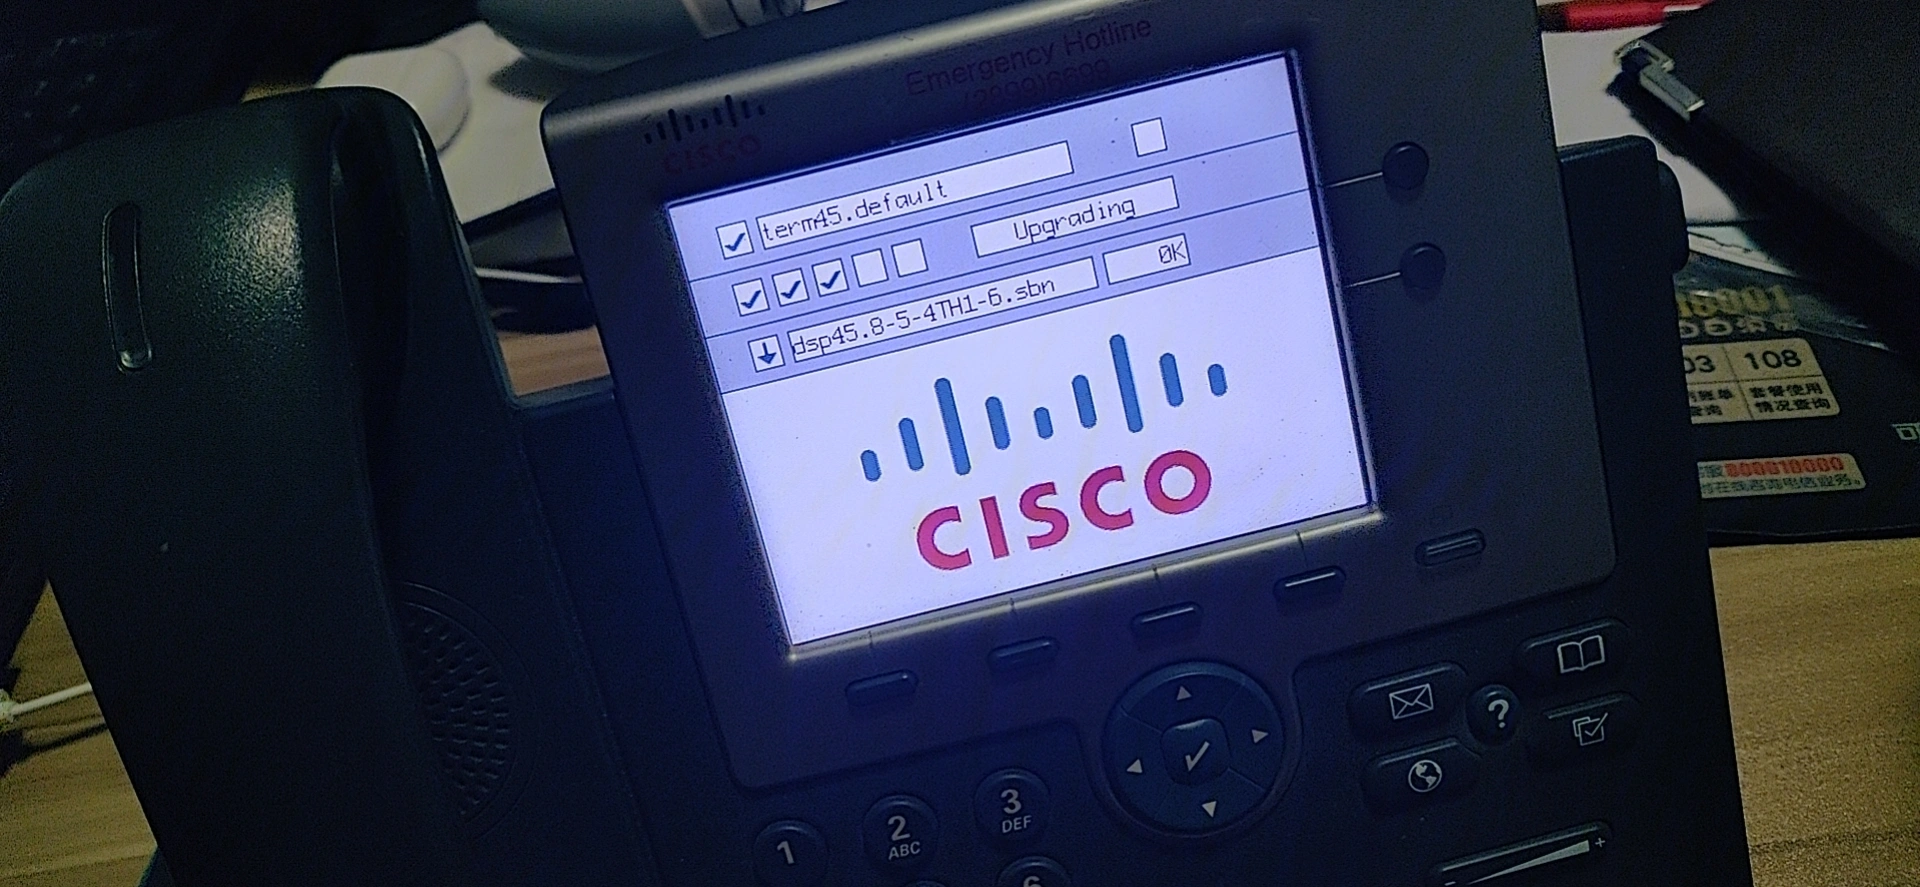
此时按顺序按下123456789*0#按键,话机将自动恢复出厂设置,并向 TFTP 服务器获取参数。如下图就是升级状态。
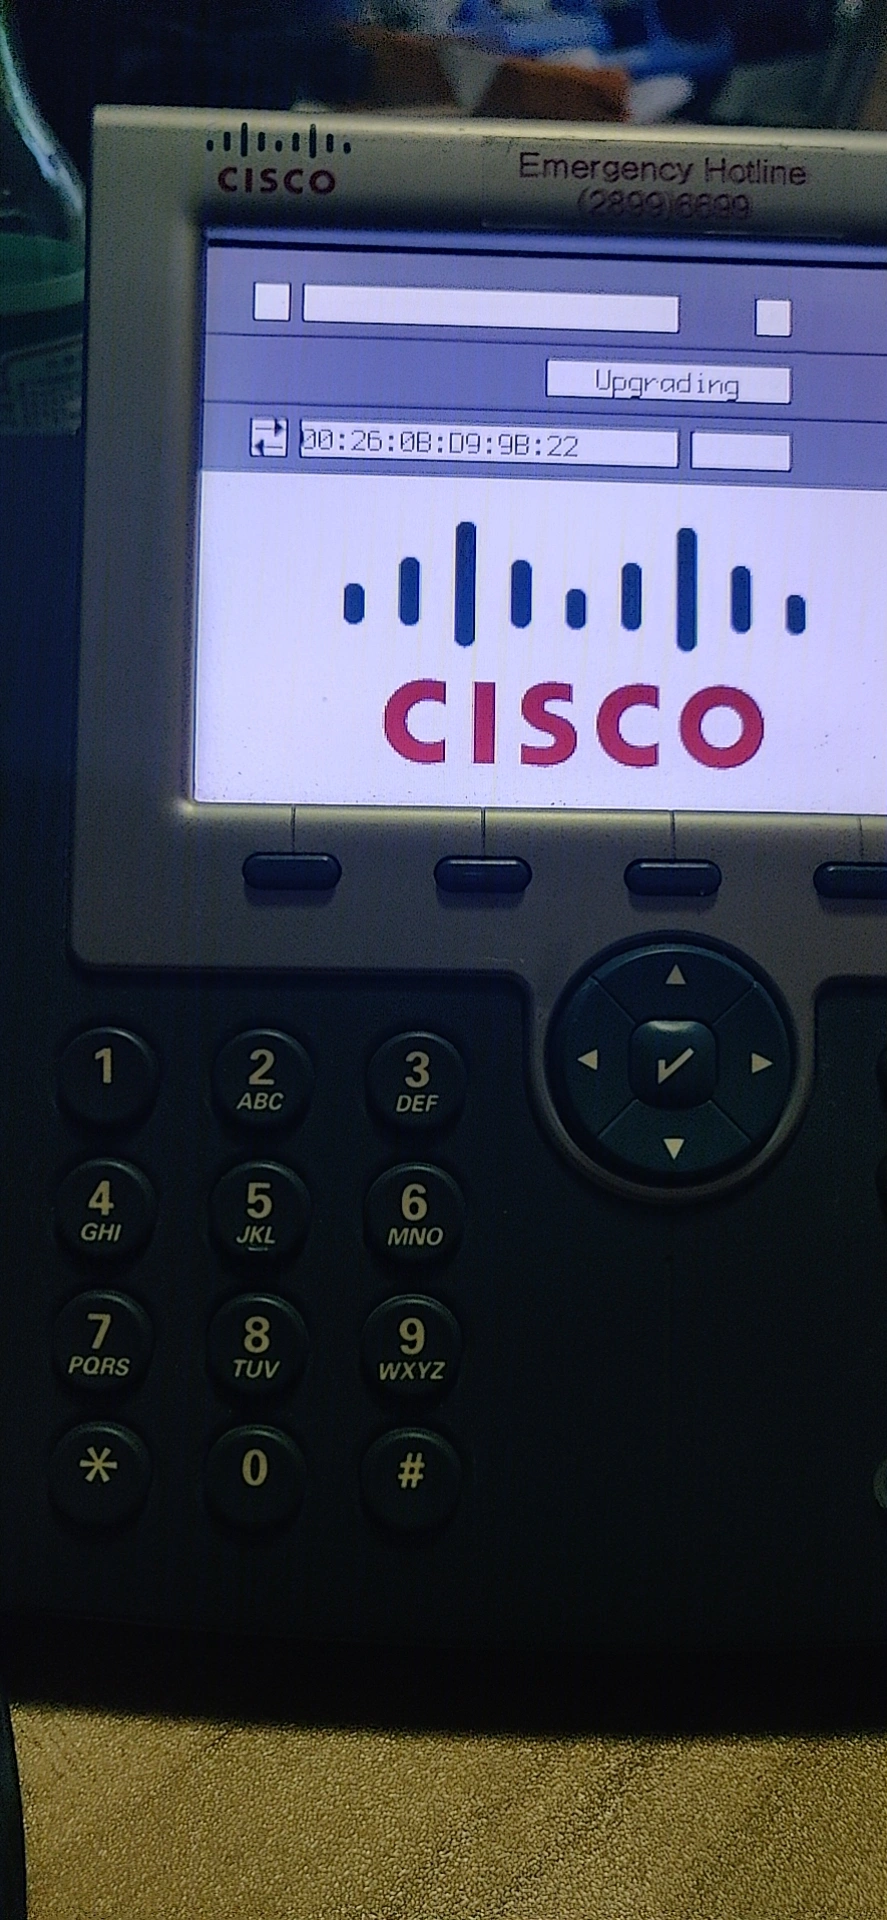 但如果长时间卡在升级状态,说明没有获取到 IP 地址,请检查 DHCP 服务器的配置是否正确。此时,可以断电重启,重启后将自动进入升级模式。
如下图,表示话机正在升级,此时千万不能断电,断电将变砖。
但如果长时间卡在升级状态,说明没有获取到 IP 地址,请检查 DHCP 服务器的配置是否正确。此时,可以断电重启,重启后将自动进入升级模式。
如下图,表示话机正在升级,此时千万不能断电,断电将变砖。
 升级成功后,话机将重启,并向 SIP 服务器发起注册。
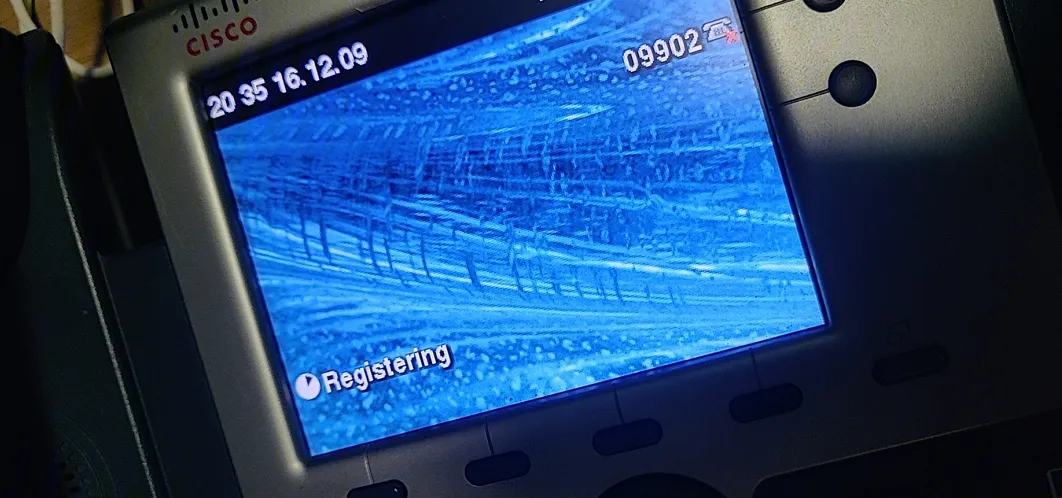 如下图,表示话机注册成功。
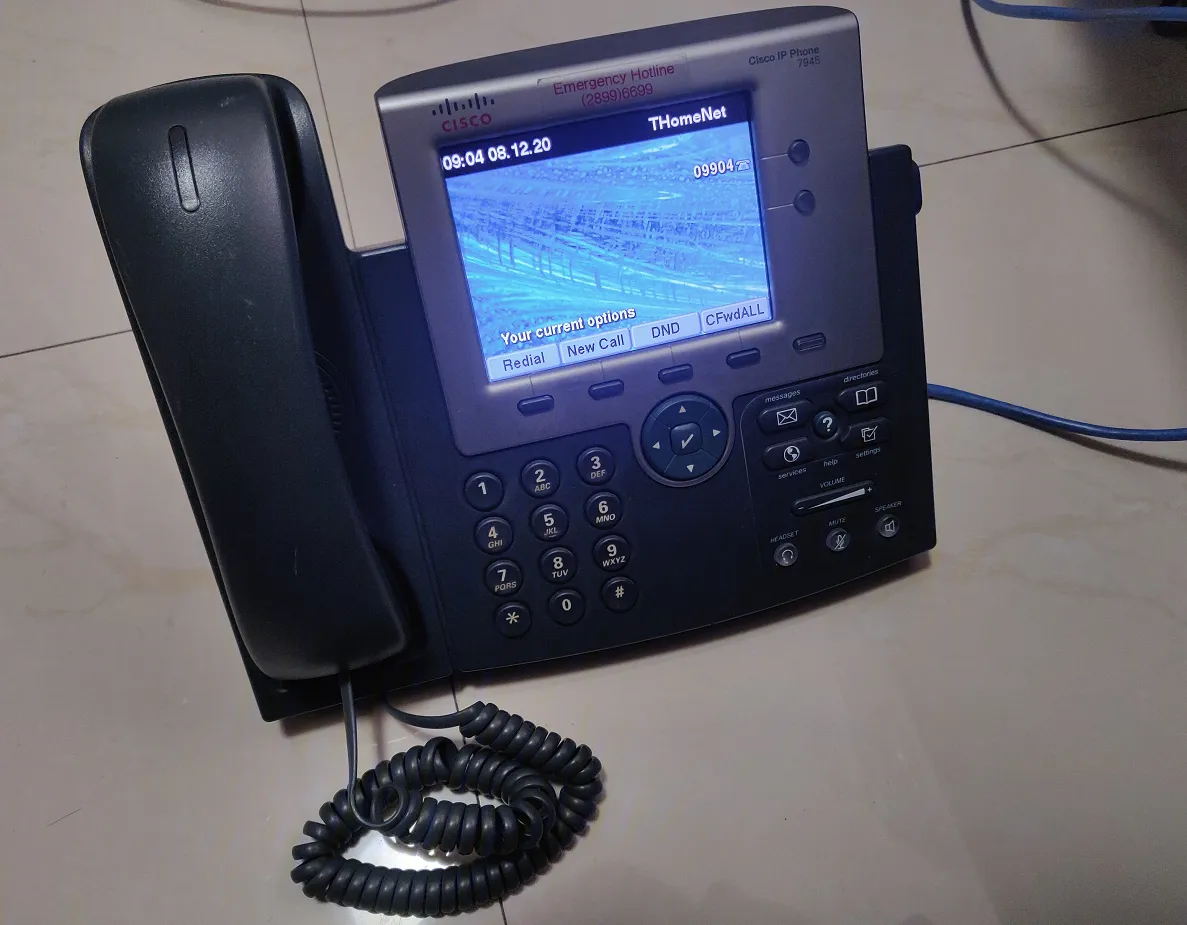
呼叫测试
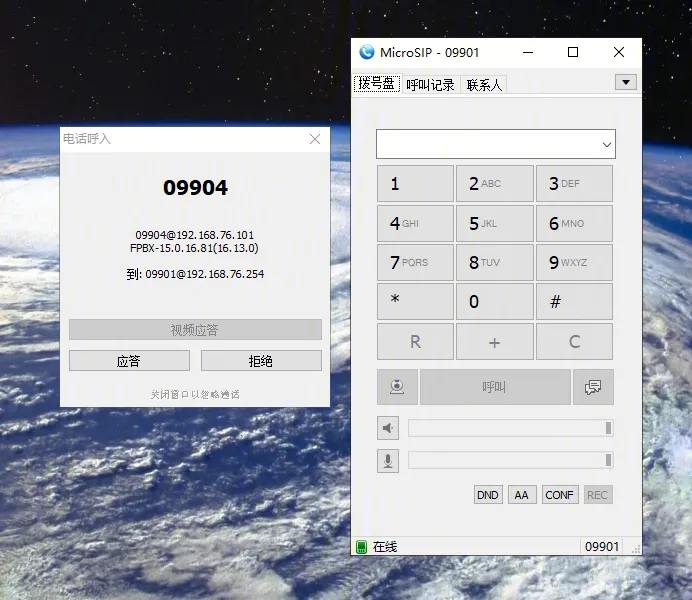
配置软电话,使用软电话呼叫 Cisco 话机成功。如下图。
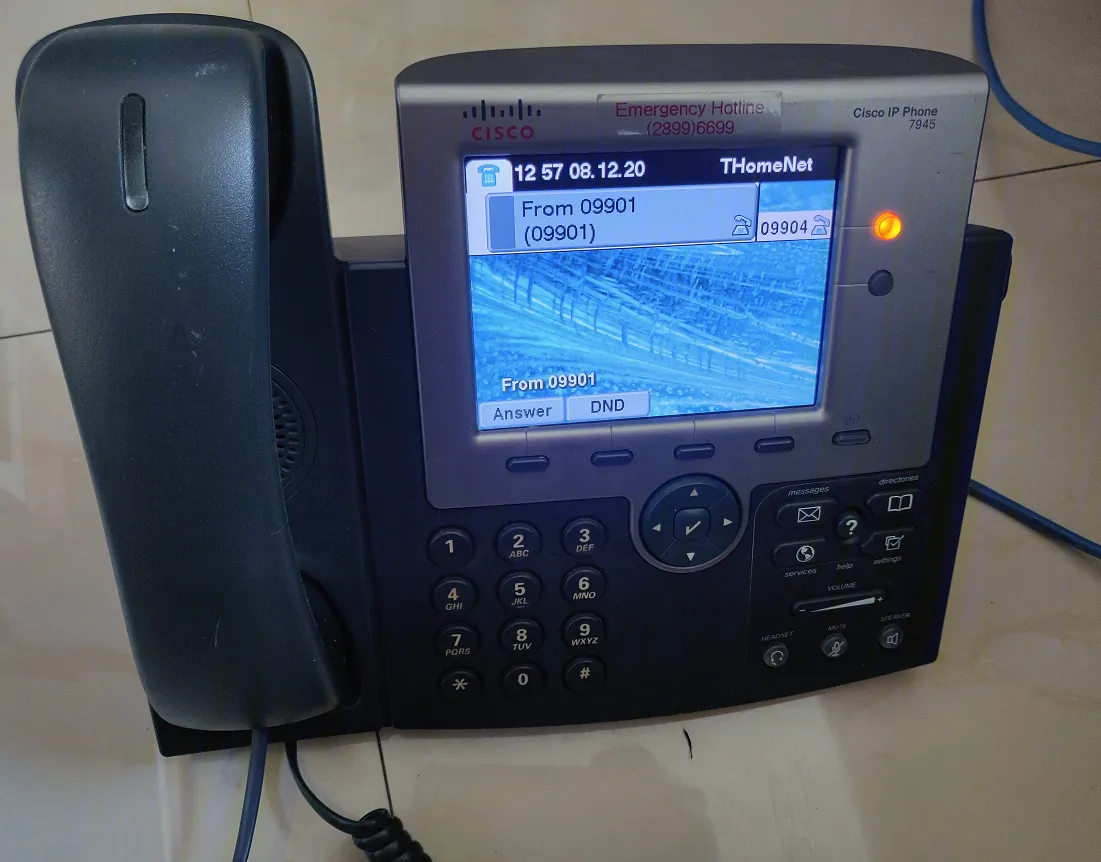 使用话机进行呼叫,如图。
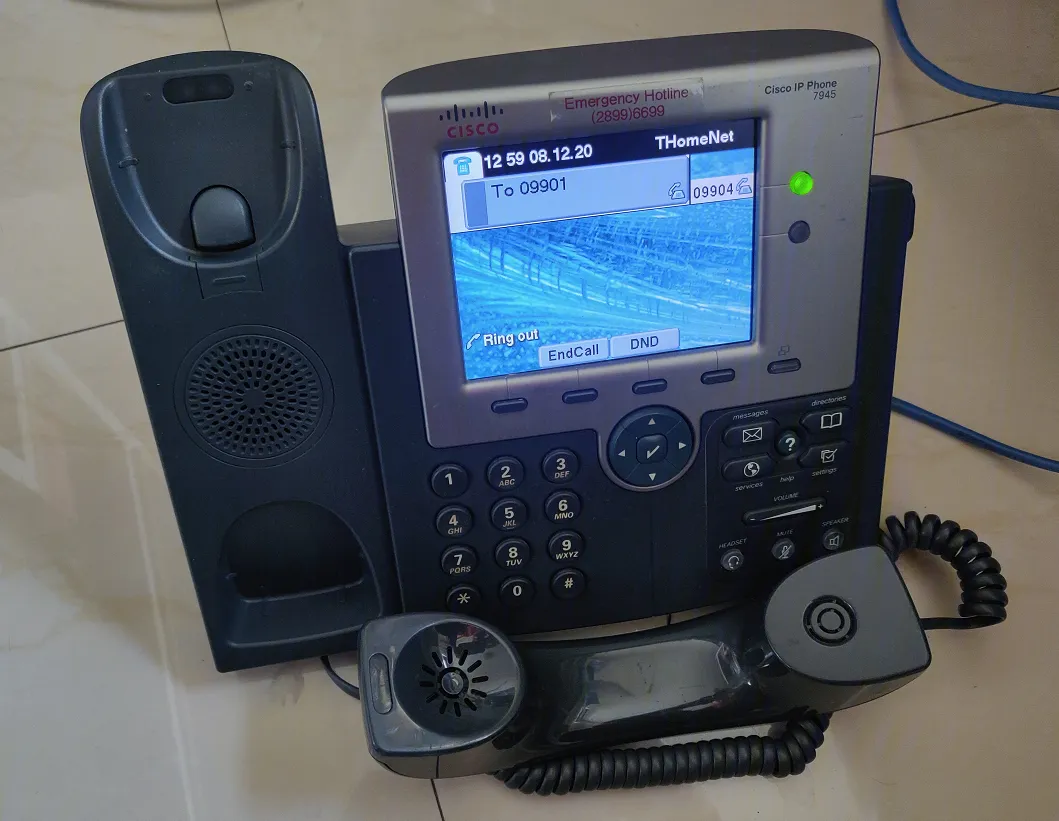 成功收到呼叫。
参考文献
- 【朱老板提供】Cisco 7942 话机接入 FreePBX 交换网:blog.kmp.or.at
- 【朱老板提供】Cisco 79x1 话机的配置:voip-info.org
- FreePBX 的安装与配置:bujarra.com
- Cisco 话机配置项详解:usecallmanager.nz
- Cisco 7945 配置文件生成器:github.com
- Cisco 7942 刷机:youtube.com